
Once the stair opening was ready, it was time to install the stringers and build the stairs.
Substairs
Our contractor was originally supposed to only install the stair stringers, but he convinced me that it’d be easier if he also made plywood treads so I’d have something to glue my oak boards to. After searching the internet for several days and not finding anything useful about how to install oak treads directly to stringers, I took his advice. The added benefit was that we then had actual stairs and didn’t have to try our luck going up and down a 16-foot ladder.


Winder Templates
Once the stairs were built, I could then do final measurements to figure out the exact size treads and risers I would need, as well as whether an off-the-shelf winder kit would work. Spoiler alert – it would not.


Since I needed to get a custom winder set, I made a template of my steps to bring to this random wood place my contractor told me about. Two of the steps were easy to figure out because they were just triangles. I measured the two sides, transferred those lengths to my fibreboard and drew a line connecting them. And voilà, I had my triangle.

The middle winder was more difficult because of its shape. I tried to measure and figure it out, but I eventually gave up and instead, used some sheets of paper to carefully fold and tape the paper to the exact measurements of the middle winder. I was pretty proud of myself for coming up with this little workaround.


When I had my templates made, we headed out to order the winder and buy the rest of our materials.

Materials
Thanks to my contractor, I had a pretty good idea of how I would install the stairs, which also meant that I knew what materials and supplies I needed to finish the job.
- Treads (straight and winder)
- Risers
- Construction Adhesive
- Wood Glue
- Biscuits (the wood kind, not the cookie kind)
Our first stop was Cosmorama in Vaughan. It’s a random place with lots of different things – baseboards, tile, stair parts, tools, you name it. I ordered my winder and we were on our way.
We then headed to Rona to get our treads and risers.

Rona has the cheapest treads and they were deep enough that I could cut the bullnose off. Or so I thought.
I had carefully measured the depth of the stairs at home – 10 1/8″. When I got to Rona, I realized that they weren’t deep enough. With the bullnose cut off, I only had 10″.


Son of a…
So back up to Vaughan we went (a 40 minute detour with a “I-could-pee-any-minute”-toddler in tow). We stopped at Central Fairbank (just down the road from Cosmorama) and I bought 11″ deep treads that would give me at least 10 1/2″ with the rounded bullnose cut off. Sigh.
Thanks to our second trip up to Vaughan, we had a late start but we were finally on our way!

Tools
Making the stairs also involved some pretty serious tools. To cut and rip the wood we used a table saw. To make the top step to the right height, we used a planer. To make the biscuit joints, we used a buscuit joint router. And to make sure the treads and risers stayed in place, we used a 16-gauge nail gun and 1 1/2″ nails.
- Table Saw
- Planer
- Biscuit Joint Router
- 16-gauge Nail Gun
- Router
Installing Treads and Risers
Now for the fun bit! With all our materials in hand, we were ready to figure out how we were going to attach our oak treads and risers to the plywood subtreads.
The first step was cutting the stairs to size. We wanted the stairs to be the same width all the way, so we took careful measurements and figured out that our treads were just over 32″ wide.


We started by cutting the first riser to width and then height. Then we continued on to the first tread, cutting to length and depth.

I had read on a few woodworking blogs that you should seal the cut edge before installing the stair because the moisture from the painted wall could warp the wood. So I made sure to varathane the wall-edge of each step and riser. I used my sponge brush to really get it in the wood and did a couple of coats for good measure.


We also needed to make sure that the joints between the riser and tread were solid and tight, so we had to biscuit joint each piece of wood and then glue them together. We made sure to measure the riser and tread from the same side and mark three places where we would biscuit join. We then carefully made sure that we were using the biscuit joint router in the right direction so the joints would line up.


Once a few treads and risers were cut and biscuit joint cuts were made, we started by installing the first and second risers. I applied construction adhesive to the back and we nailed a few 16-gauge nails in the back to hold it in place, carefully making sure to only put them at the bottom so the wood could still expand. We then glued the biscuits in place using wood glue and eventually put in the first tread.


By the end of the first day, we had two full steps installed. We then used concrete bags and some heavy boxes to wear them down and make sure to minimize the gaps between the wood.

The second day was much more productive. We started earlier and made all of the tread and riser cuts first. It still took time to make sure that each riser and tread were exactly the right height/depth and length.
We then made all the biscuit joints, using the other treads and risers as templates. All we had to do was make sure the wood was positioned right and we were able to quickly make all the necessary cuts. It was much more efficient this way!

By the end of the weekend, we had cut all but the winder steps and installed most of them. We then spent the week installing the steps 2 at a time so we could use the concrete bags to weigh them down.


Installing the Winder
The custom winder steps took a week to make and were ready for pickup the following weekend. Luckily this meant that I didn’t lose any time waiting for them to be made. We also had to go and buy a couple more treads since we messed two up the previous weekend.


Before we cut the winder treads, we decided to cut the riser pieces below each riser. The complicated bit was figuring out what angle to cut and making sure we didn’t cut too much. We used a angle measuring tool, transferred the angle to the riser and cut it with the mitre saw (using a test piece first).


The only complicated riser was one that wasn’t lining up with the other treads and risers. We figured it was because we actually had to plane it down to a thinner thickness so it would all line up. Slowly but surely, we planed and planed until we thought the piece was the right thickness. We cut the angle and held our breath to see if we were right.

Once all the risers were cut, we moved on to the treads. The first one was easy – it was a triangle so we only had 3 sides to worry about.
The first problem was that the tread wasn’t the exact shape of our stair. It was close, but we had to fix the angles before we could start cutting to size. We used the adjacent side as our “straight” edge and then started to mark the side we wanted to cut. There was a gap against the wall in some areas (because it wasn’t straight) so we measured an inch from the wall to the tread (despite the gap) to fix the angle. We then took it outside and used the circular saw to cut along our new, straighter edge. We clamped another piece of wood to the tread to use as a guide for our circular saw. We then ran it through the table saw to clean up the line.


We kept cutting away at the tread until each side was the angle and length.

Making the middle winder was more complicated because it involved 4 sides and 4 different angles. We took the same approach as with the first winder and straightened out the first three sides. We cut off little by little until we could slide the winder tight against the wall. The only difference this time was that we used a router to cut our angles. It was much more accurate than the circular saw and created a much cleaner edge. We didn’t have to run it through the table saw or anything.

We then cut the final winder step (which was a piece of cake in comparison) and called it a day.

Installing the Floor Pieces
The final riser and tread was complicated because I first had to figure out how the floor would be finished around the opening. So we made the riser, top step and floor pieces all at the same time, modifying each until it worked.
To start, we made the flooring pieces. First, I cut away the old flooring using my new oscillating multi-tool!


The first piece of flooring would be directly under the handrail and would be exactly the same width. Easy. We cut the piece on the table saw to width and then planed it until it was the same thickness as the hardwood.
Then we had to figure out how wide to make the next piece of flooring that would frame the opening of the stairs. I wanted the piece to overhand the finished drywall, but only but a tiny little bit. I had to also make sure that it lined up with the top step. We also had to plane the riser so it would be flush with the top step.

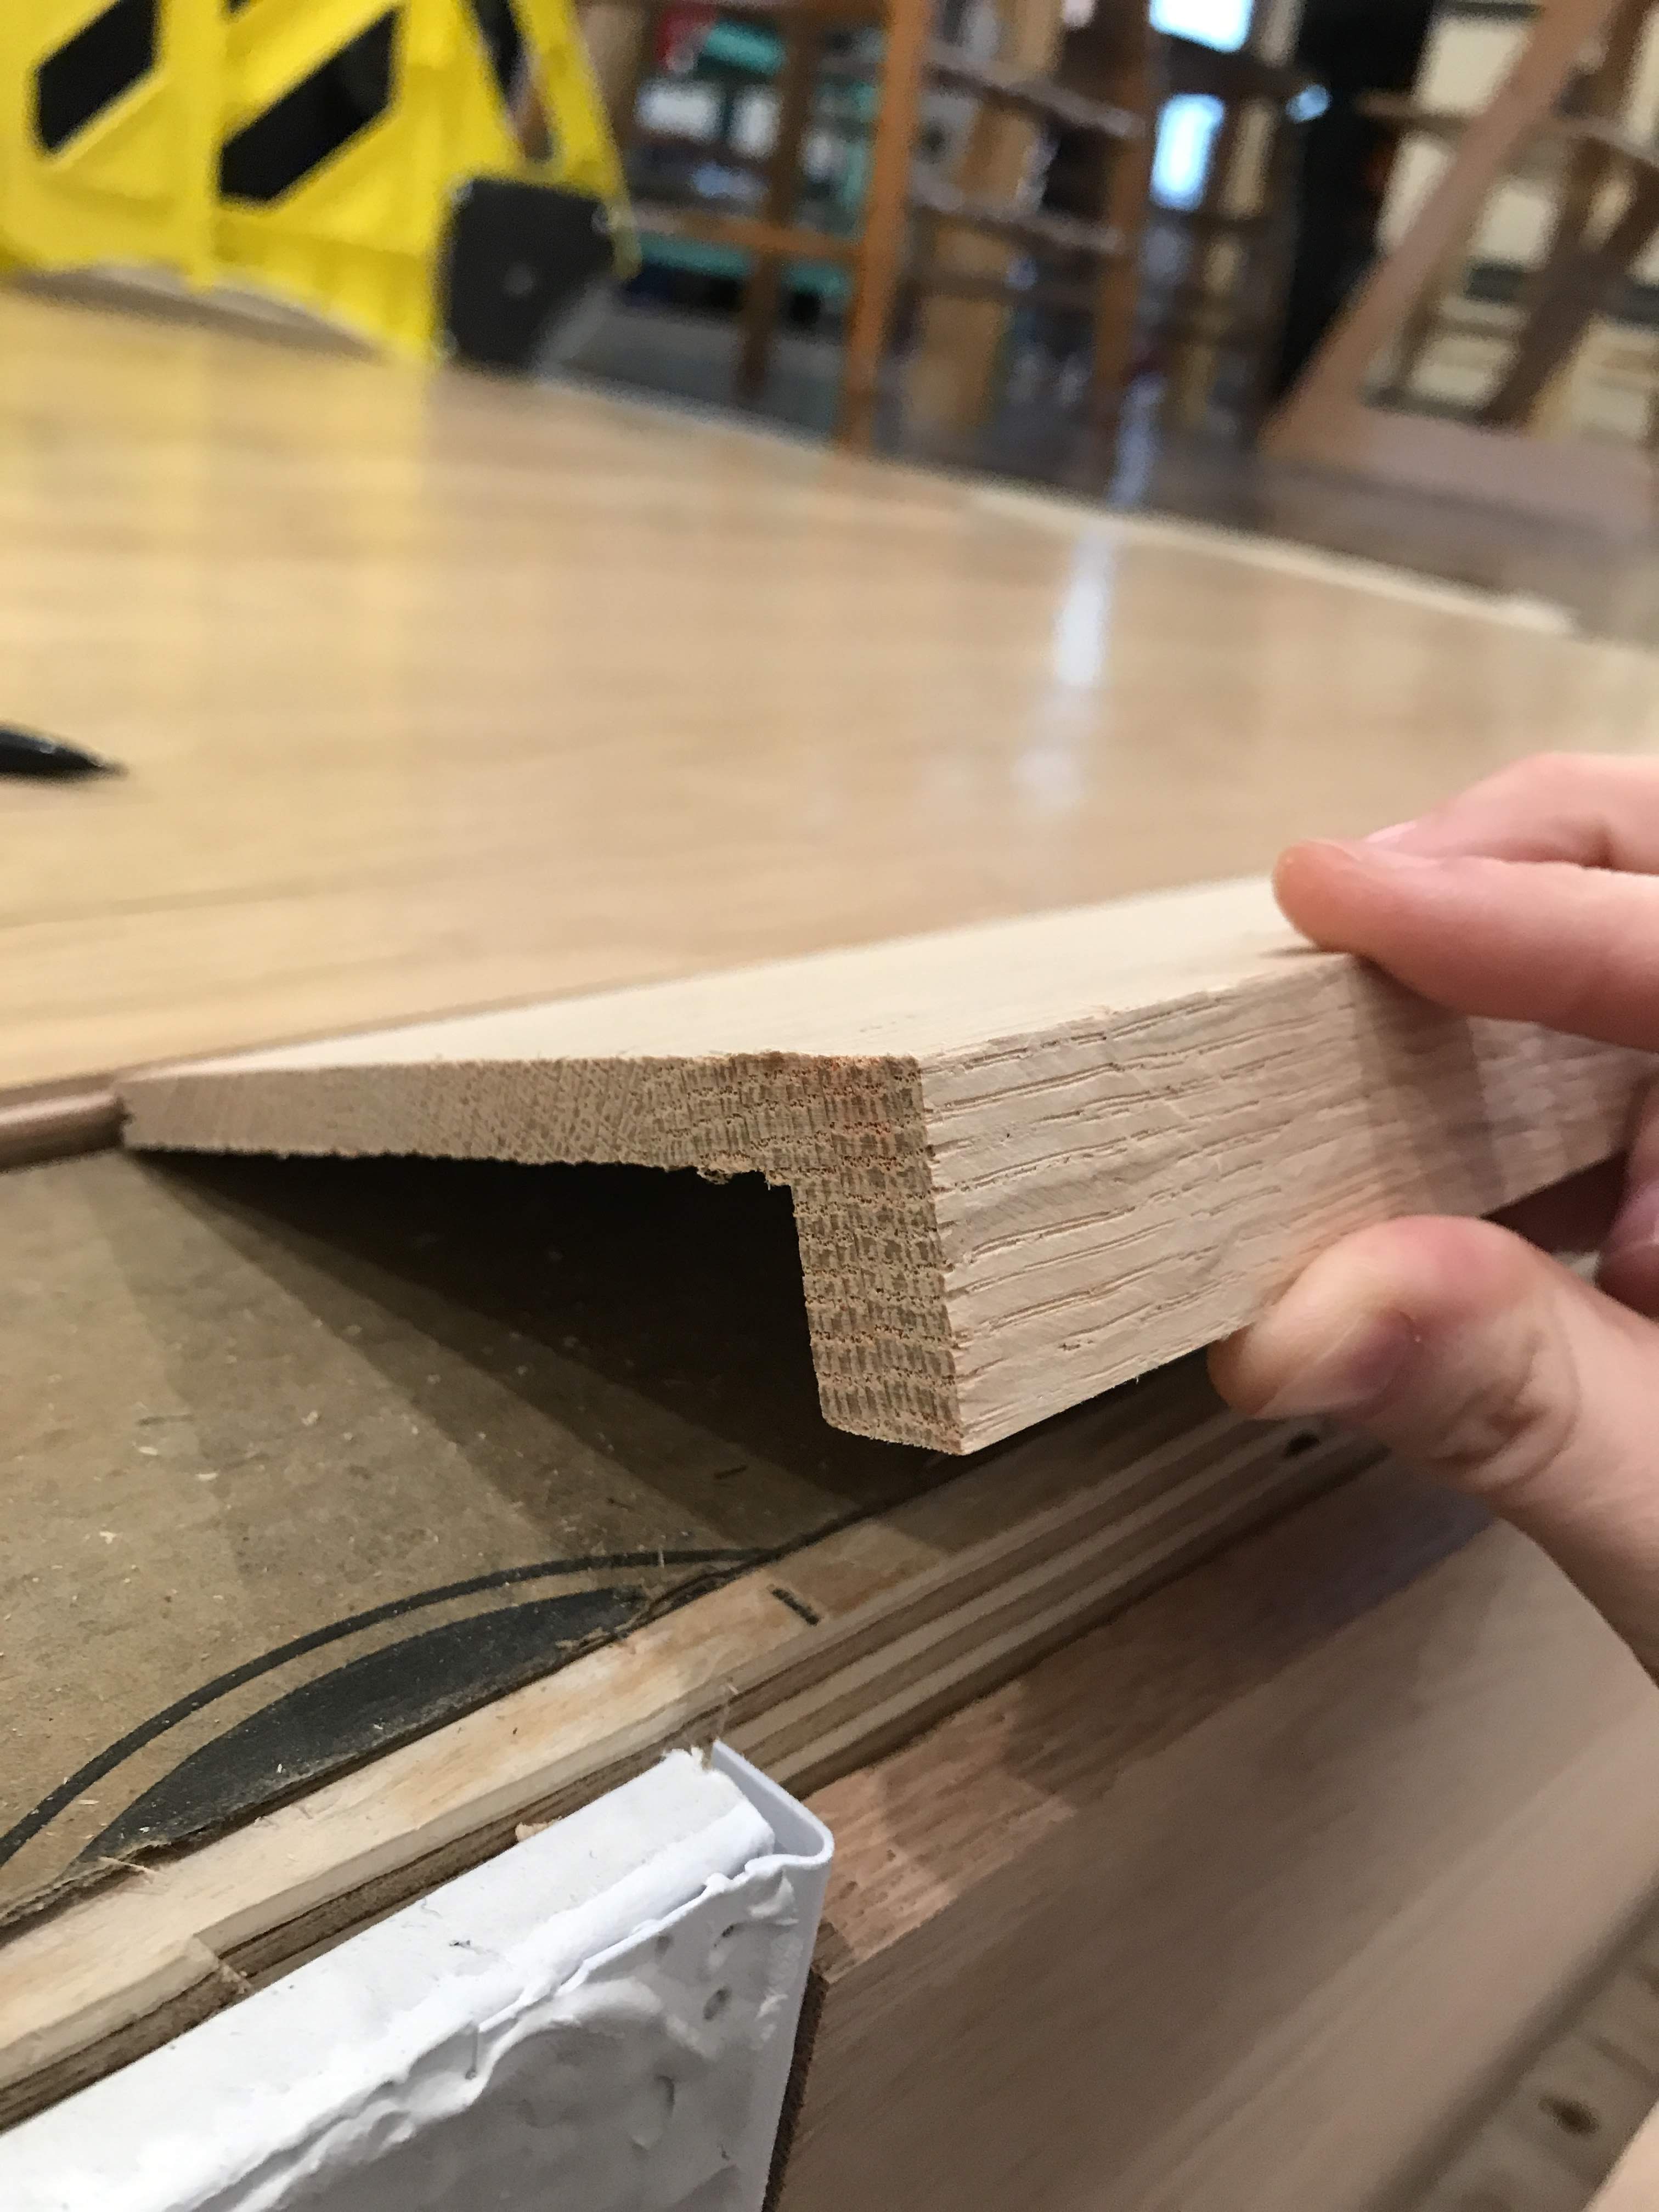
The final piece of the puzzle was that I wanted to give the illusion that the top step was the same thickness (1″) as each of the treads on the stairs, but on the floor, it could only be 3/8″ (same as the flooring). So we had to create an L-shape step.

Once all the flooring and stair pieces were done, I finished the drywall by installing an L-bead so there wouldn’t be a gap between the new stairs and the wall. Yay for more mudding and sanding!


I also finished the floor pieces so I could then install the spindles. I used the same varathane I had on hand, but I wasn’t as concerned about durability, since no one would be walking on this part of the floor. Once the varathane was applied, the colour quickly matches the neighbouring floor pieces.

When everything was in place, the stairs looked great!


Finishing the Stairs
The final step in building the stairs was to finish them. Since we didn’t stain our floors, we didn’t have to stain the stairs.

I bought two grits of sandpaper: 120 grit and 220 grit and started with the 120 grit. I was originally going to use the orbital sander, but I remember how much mess that thing makes from my drywalling days, so I opted to use some good ol’ blood, sweat and tears and worked my way up each step by hand. I then made sure to clean off all the dust.


Finding a floor varathane was tricky since there were several options and I wasn’t sure which to use. But I ended up choosing Varathane’s brand Nano Defence, which seemed to have good reviews. I applied a first coat with a foam brush (which took me an hour and a half!) and let it dry for 24 hours before touching them again.


Applying the varathane brought up the grain in the wood, so the stairs went from nice and smoothly sanded to fairly scratchy. After sanding the stairs with the 220 grit sandpaper, the stairs were smooth again. I removed all the dust and applied a second coat of varathane.
I then sanded the stairs a third time with a much finer grit of sandpaper – 400 – which I already had lying around. The stairs were extremely smooth but required one last coat of varathane, bringing the total coats to 4!
When the stairs were done, they looked fantastic!


[…] I was busy project managing much of the kitchen work (and trying to finish our new basement stairs), I left Alex in charge of setting up a make-shift kitchen in the […]
[…] we rebuilt the basement stairs, we wanted them to be against a new wall that hid the fact that we did not have a straight or flush […]
[…] we rebuilt the basement stairs, we wanted them to be against a new wall that hid the fact that we did not have a straight or flush […]
[…] been more than 3 years since we built our new basement stairs and we’ve been living dangerously without a handrail – on either side! – for the […]
[…] couple of years ago, I build a new staircase and wall to the basement which included a built-in bookshelf in the wall. At the time, I chose to […]