
Phase 6 was supposed to be the final step in our backyard renovation plan. Our garage was supposed to be done in early May and I’d have all summer to complete all the other pieces of our backyard.
But if you’ve been reading about our backyard drama in our fence posts, you’d know that things have gone awry and our original plan had to be changed.
Since May, we’ve had a large dirt pit as our backyard and I was tired of not having any space this summer to sit outside or where the kids could play. Our backyard use has been pretty much non-existent because of constant failed promises and lies from our contractor. So with the garage still not started, I decided to advance some of the work closer to our house so I could get something done this summer. After the fence and pavers were put in, I could then start working on our floating deck.
Phase 1: North Fence and Gate
Phase 2: GaragePhase 3: South FencePhase 4: Garage Canopy and DeckPhase 5: Walkway and Pavers
Phase 6: Floating Deck
To help prepare the ground for the new deck, I brought back José and friends to dig down and lay a gravel base.
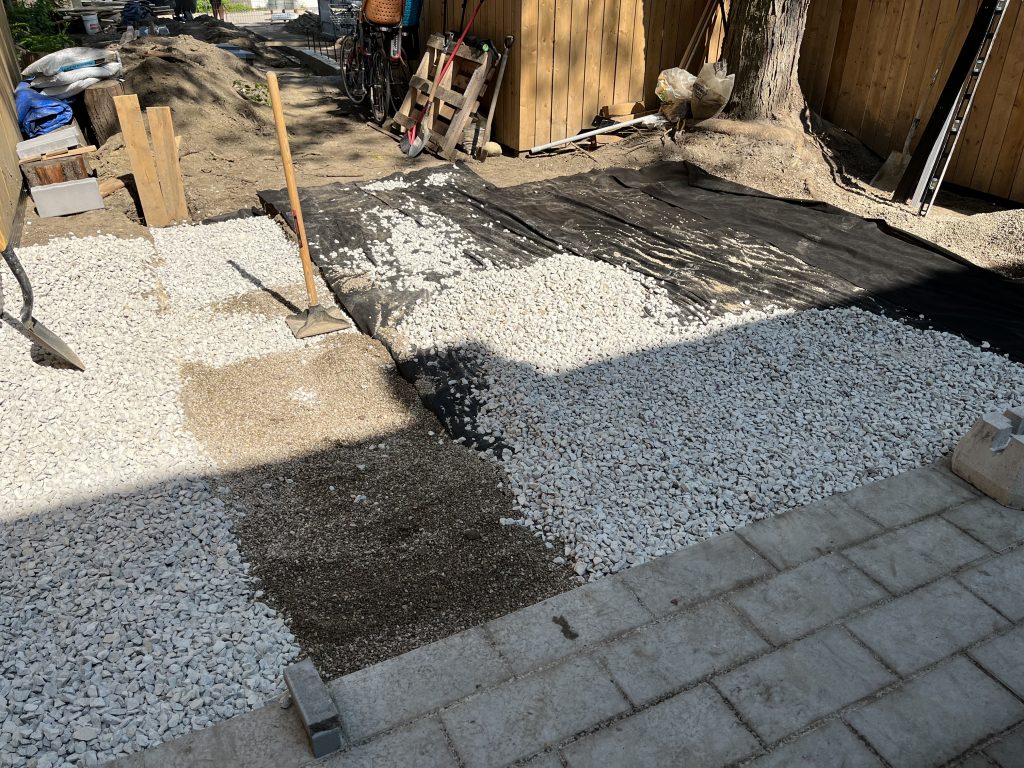
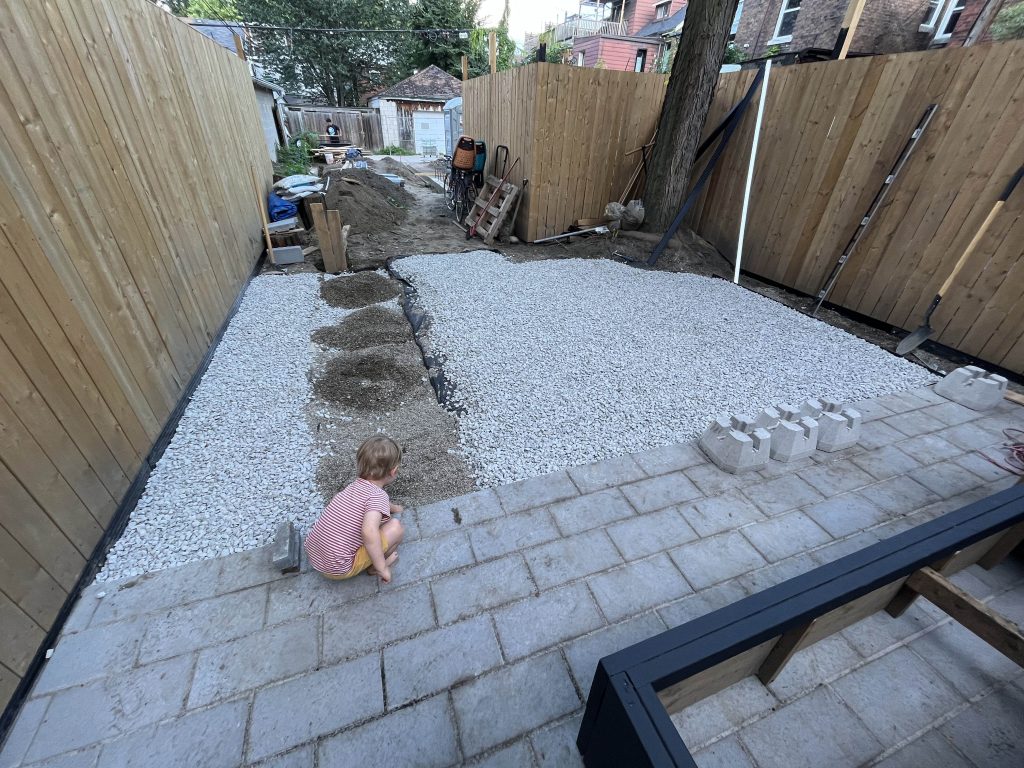
With the gravel base in place, I could then start laying out the perimeter of the deck. I had a vague plan of where the deck would go and how it would be supported by concrete deck blocks, but it wasn’t until I started cutting wood and placing boards down that I could confirm exactly what the deck would look like.


Once I had the structure in place, I spent quite a bit of time making sure that the deck was square (by measuring across the square in each direction) and also making sure it would look square against the fence and new walkway. Once I was happy with where things were, I screwed in scrap wood to keep the corners in place.

The most complicated part of the deck was building the section around the tree (since I couldn’t get my concrete blocks that close) and the little area beyond the main square – mostly because it required so many small cuts and repositioning of the concrete blocks to make it stable. It was squeaking a bit when I stood on the cantilevered bit, so I jammed some spare pavers underneath to give it more stability. Let’s hope they don’t move. Eek.


Once the more complicated bits were done, I moved on to the main area of the deck, which required more concrete blocks but was more straightforward.


I also put in some additional blocking to help reinforce this bugger as much as I possibly could. Perhaps it was overkill, but I was happy to spend the extra day making a million cuts for blocking than have to deal with any drama after the boards are in.


Once the main deck area was done, I moved on to the step boxes. My plan was to create 2 boxes that could wrap around the deck and sit on small, cheap pavers I bought from Home Depot.


It was actually quite tricky to get the pavers level and at the exact right height for the stair box to sit snugly (but not too snugly) under the main deck structure. But after an hour or so of working on it, I managed to get every brick to sit at the right spot and put the stair box in place.
In the middle of my stair-making, Alex challenged me on not having a stair on the backside of the deck. My initial thought was that I wanted to only have steps where there were pavers (on the front and side) and keep people from stepping down into the grass (at the back). But, after thinking about it for a bit, decide to extend the gravel at the back of the deck and build a step there too.

Because I was tucking the stair boxes to be in line with the deck frame above, I realized at my final step that I had to modify the long stair so it would fit between the other stair boxes. I should have made the long (middle) stair box first and then changed the length of the other two boxes, but I already had them made and in place, so I opted to cut away from the long stair piece to make it all work.


Once all three stair boxes were made and in place (with zero movement when I stepped on them), I secured them to the main deck using large metal plates. The plates seemed to hold everything in place really well.

Once the deck frame was completely finished, I applied joist guard to the top of the joists to protect it even more from rain and snow.

The entire structure of the deck took me 4 1/2 days, spread over a 2-week period. Not bad, but definitely not the “build a floating deck in an afternoon” promise that all the online videos make. Plus that was only the structure, not the deck boards!
Before I put any boards on the deck, I wanted to finish staining the fence so I wouldn’t have to worry about protecting new cedar boards.

Finally, by the last weekend in August, I was finally ready to install new cedar boards on top of my floating deck structure. I was determined to have this new deck before the end of the summer, so I was committed to working on it as much as I could. My cedar wood order arrived late Friday morning and I quickly got to work.

My first cuts were for the edge pieces – the border that would frame the deck and also make sure that everything was square and straight. These 7 pieces took me the entire day. The trickiest was the non-45 degree angle around the tree. It took a bit of thinking but eventually I got the angle right.

Once I was done all the border pieces, I could see that I had made a big mistake. In the deck frame design that I copied, all of the deck boards went from one side of the deck to the other. In my deck, I had a border that was perpendicular on two sides. So on those two sides, I had covered the deck joists with my border and the next joist was too far for the main boards. I could add more blocking, but I had a lot of things in the way so I ended the day feeling discouraged and not really sure how I was going to move forward.

The next morning I attacked the problem with fresh eyes and managed to find a way to add additional joists so the boards would have something to secure to at the ends of each side. And I even managed to find a decent solution for the extra piece I needed near the tree.


It was then time to put on all the deck boards. This step was much more straight forward. I just had to cut each board to length and router the cut end so it looked like a finished piece. And of course it rained on me for most of the day, but not enough to fully stop me.


It got slightly most complicated around the tree (which was becoming the bane of my existence). To make sure that all the angle pieces were the same, I cut all the angles first and then later cut each board to length.

One of the trickiest pieces was where I had to rip a single board to two different widths because of where the border was.


I was determined to finish the entire main area of the deck and by 6pm I had managed to get every board installed! I should also note that I used my trusty Camo tool – the same one I used on our main deck – so that all of the screws were hidden.


The next morning I drove up to a North York Home Hardware to pick up a specific stain. I had previously used Cabot stain, but I wasn’t loving its durability on our main deck and wanted to try something new. Cutek Extreme came recommended by our neighbour and the online reviews seemed really good. It’s an oil-based stain, but would penetrate the wood better than Cabot and hopefully seal the wood better. At $129/gallon, it’s not cheap but worth every penny if it ages the wood better than Cabot has.

The next step was to rip all the boards for the rise of the stairs. Because those pieces would be hard to sand later, I pre-sanded them before I installed them.
Installing the risers was straight forward. I just had to make sure that they were level and flush with the deck frame so the steps would sit nicely on top of them – especially because I would be screwing the step pieces into the risers along the outer edge.

After the risers were done, I installed the top steps on the 3 sides of the deck. Given that this was only 6 pieces total, I expected it to go much faster than it did. But between trying to make everything straight and have the angles line up, it took me most of the afternoon to cut those 6 steps.


I wasn’t sure that I was going to finish. It was already 5pm by the time I was done with the steps but I pushed through and sanded the entire deck once all the boards were in place. Sanding only took me about 30 minutes and then I applied a first coat of the Cutek Extreme using a stain pad. The stain went on easily and quickly.
It took 2 days to fully dry before I applied a second, thin coat to the entire deck.

The deck was finally ready to use in time for the final long weekend of the summer.